Table of Contents
In this section you find an overview to configure BibleTime, which can be found under in the main menu.
The BibleTime user interface can be customized in many ways depending on your needs. You can access the configuration dialog by selecting .
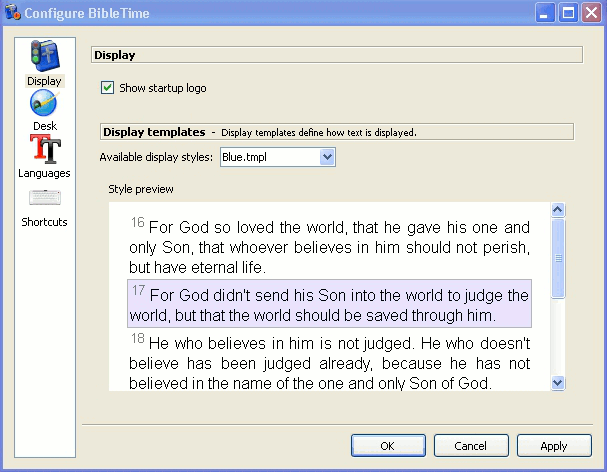
The startup behavior can be customized. Select from the following options:
Show startup logo
Display templates define the rendering of text (colors, size etc.). Various built-in templates are available. If you select one, you will see a preview on the right pane.
Many features provided by the SWORD backend can now be customized in BibleTime. These features are documented right in the dialog. You also have the possibility to specify standard works that should be used when no specific work is specified in a reference. An example: The standard Bible is used to display the content of cross references in the Bible. When you hover over them, the Mag will show the content of the verses referred to, according to the standard Bible you specified. With the use of text filters, you can control the appearance of the text.
Here you can specify which language should be used for the biblical booknames. Set this to your native language, if it is available, and you'll feel at home.
By default, BibleTime uses the default system display font. You can override this font if necessary. Some languages require special fonts to be displayed correctly, and this dialog allows you to specify a custom font for each language.
 |
The Options dialog - Fonts.
BibleTime can now use all supported fonts. As long as the works you are interested in display correctly nothing needs to be done here. If a work only displays as a series of question marks (??????) or empty boxes, then you know that the standard display font does not contain the characters used in this work.
To correct this, choose this work's language from the drop down menu. Select the use custom font checkbox. Now select a font. For example, a font that supports many languages is Code2000. If no installed font can display the work you are interested in, try installing the localization package for that language.
Detailed font installation instructions are outside the scope of this handbook. For further information you might want to refer to the Unicode HOWTO.
Fonts can be installed from a number of sources:
Your *nix distribution.
Your distribution's localization packages.
An existing Microsoft Windows® installation on the same computer.
A font collection, such as are available from Adobe or Bitstream.
Online font collections.
Unicode fonts support more characters than other fonts, and some of these fonts are available at no charge. None of available fonts includes all characters defined in the Unicode standard, so you may want to use different fonts for different languages.
Table 4.1. Unicode Fonts
| Code2000 | Perhaps the best free Unicode font, covering a wide range of characters. |
| SIL unicode fonts | Excellent Unicode fonts from the Summer Institute of Linguistics. |
| FreeFont | A new free Unicode font initiative. |
| Crosswire's font directory | Several fonts available from the Crosswire Bible Society FTP site. |
| Bitstream CyberBit | Covers almost the entire range of Unicode, but might slow BibleTime down because of its size. |
| Clearlyu | Included in some distributions. Contains European, Greek, Hebrew, Thai. |
| Caslon, Monospace, Cupola, Caliban | Partial coverage, see information on linked site. |
There are good Unicode font lists on the net, as the one by Christoph Singer ( Multilingual Unicode TrueType Fonts in the Internet), or the one by Alan Wood ( Unicode character ranges and the Unicode fonts that support them).
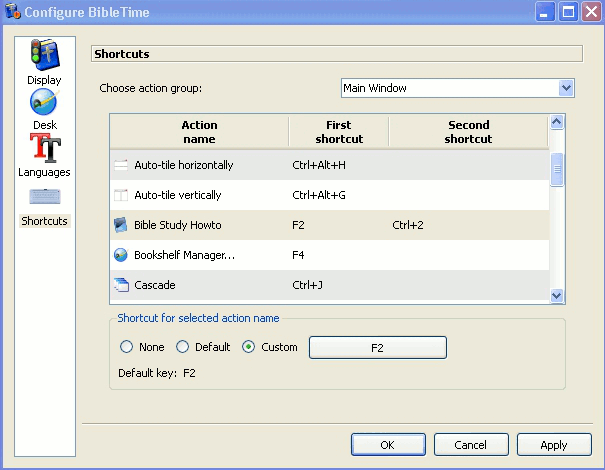
Shortcuts (previously known as HotKeys) are special key commands that can be used in the place of the menu items and icons. A number of BibleTime's commands have predefined Shortcuts (see the Shortcuts section for a complete listing). Most of BibleTime's commands can be assigned Shortcuts. This is very helpful to quickly access the functions that you need the most.
 |
In the preceding example, F2, Bible Study HowTo has a secondary shortcut defined, CTRL+2.